Product Options - Add Selection to Product Card.
Product Options Module allows you to add a selection of options within one product. This way we can add product variants, for example, in terms of color. Each variant can change the price, weight or product photo. Product options can be added through previously defined templates, directly to the product or through the product import/export module.
Table of Contents
- Product Option Templates
- Adding a Product Option Template
- Editing a Product Option Template
- Adding an Option to the Template
- Adding a Filter to the Template Option
- Adding an Option Value to the Template
- Adding a Sub-Option to the Template
- Adding a Sub-Option Value to the Template
- Setting the Default Option Value in the Template
- Changing the Order of Option Values in the Template
- Changing the Nesting of Options in the Template
- Inserting a Product Option Template
- Product Options
- Product Appearance with Options
- Adding Option Filters
- Product Option Configuration
In the admin panel, select Applications → Products ![]()
Product Option Templates
Adding an Option Template
Select Option Templates
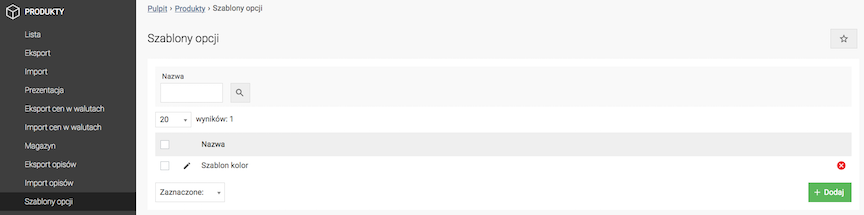
- Press the Add button,

- Enter the Option Template Name,
- Press the Save button,
- Press the Save button.
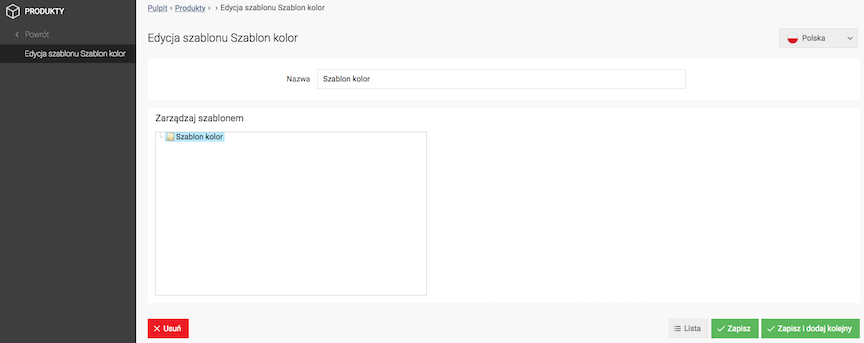
Editing an Option Template
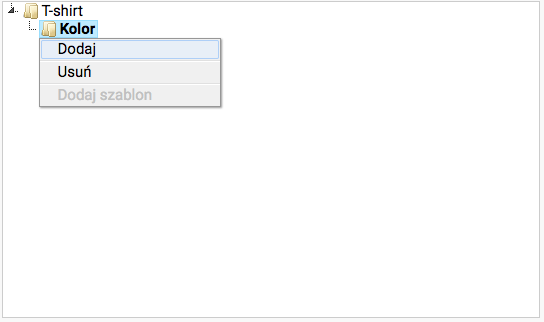
Adding Options to Template
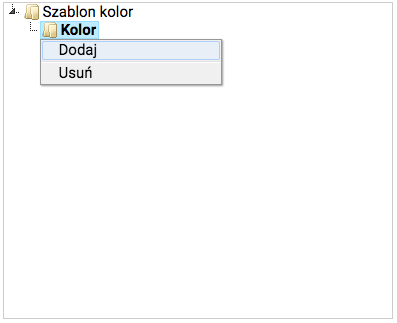
- Right-click on the Name of the option template,

- Select Add,
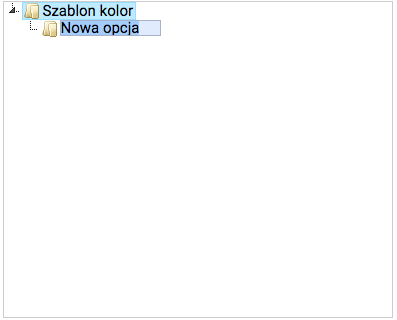
- Enter the Option name,
Enter the option name (e.g. Color, Size).
- Press the Save button.
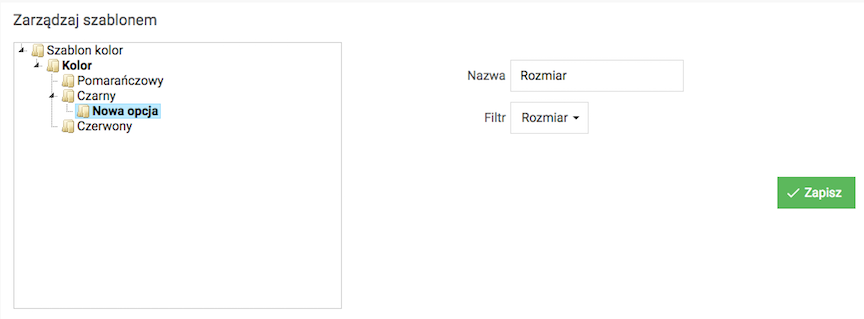
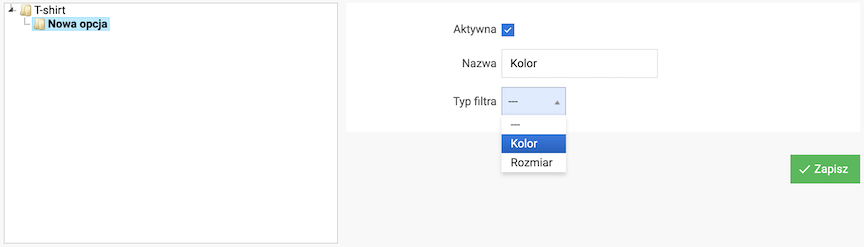
Adding a filter to the template option
- Check the Option,
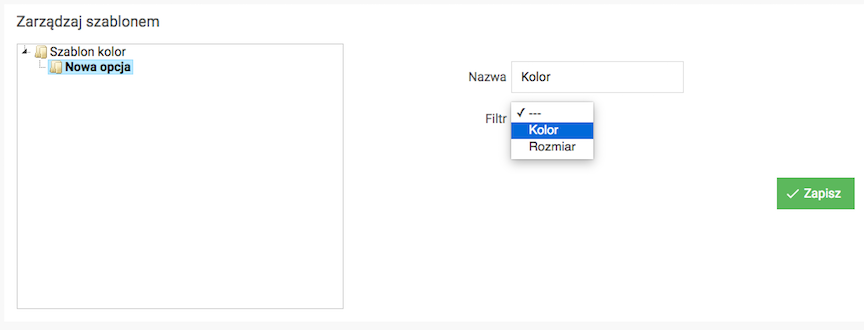
- Select the Filter type,
Option filters must be entered in advance.
- Press the Save button.
See how to add option filters.
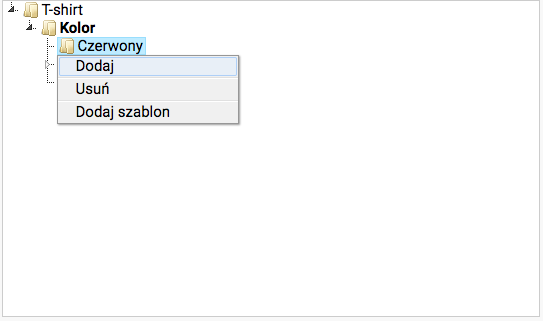
Adding option values to the template
- Right-click on the Name of the option,
- Select Add,
- Enter Value,
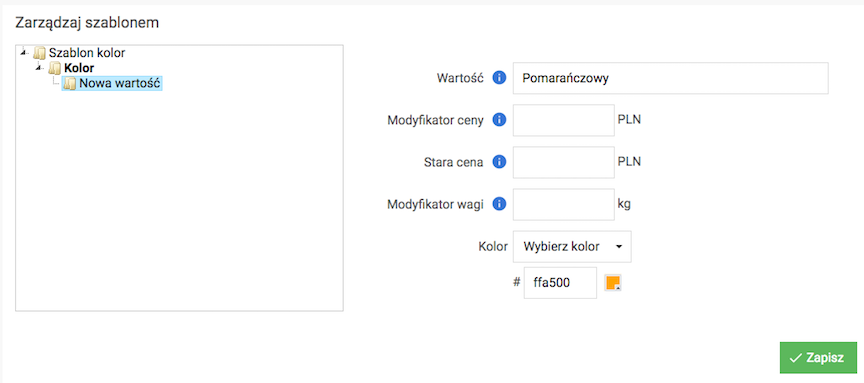
Enter the option value (e.g. green, XL).
- Enter Net price modifier,
+/- amount (e.g. -10.25)- increases or decreases the net price by the specified amount,+/- amount % (e.g. +50%)- increases or decreases the net price by the specified percentage,amount (e.g. 30.99)- sets the specified amount regardless of the product price,
- Enter Weight modifier,
+/- weight (e.g. -10.25)- increases or decreases the weight by the specified value,+/- weight % (e.g. +50%)- increases or decreases the weight by the specified percentage,weight (e.g. 30.99)- sets the specified weight regardless of the product weight,
- Enter Color (HEX code e.g.
#ffa500[orange]) or upload Photo,Option available for the Color filter.
- Press the Save button.
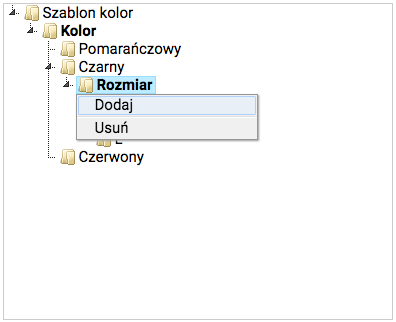
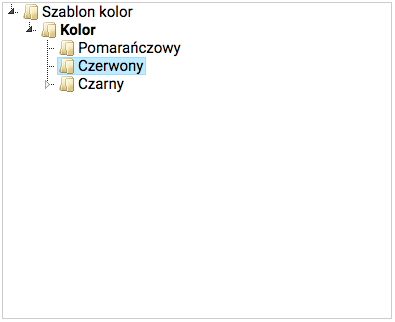
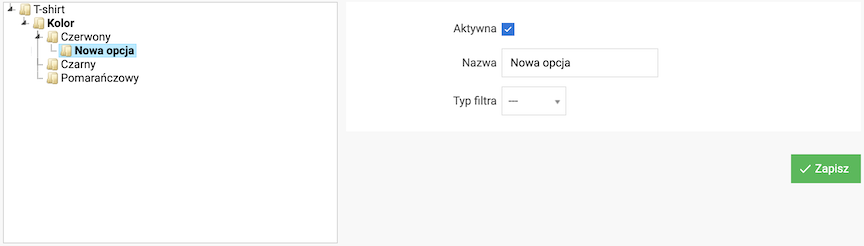
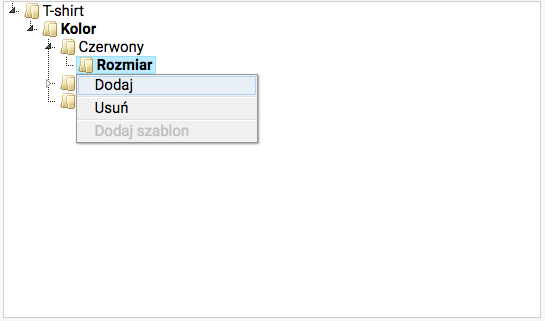
Adding suboptions to the template
- Right-click on the Name of the option,
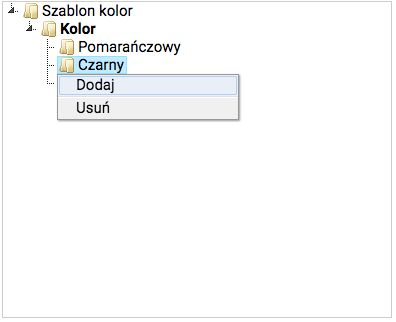
- Select Add,
- Enter the Option Name,
Enter the name of the option (e.g. Color, Size).
- Select the Filter Type,
- Press the Save button.
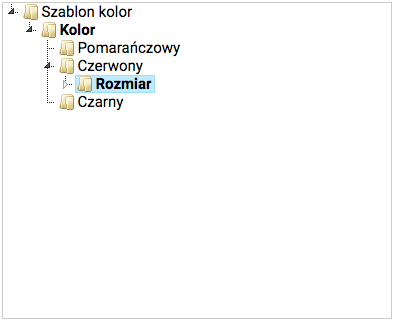
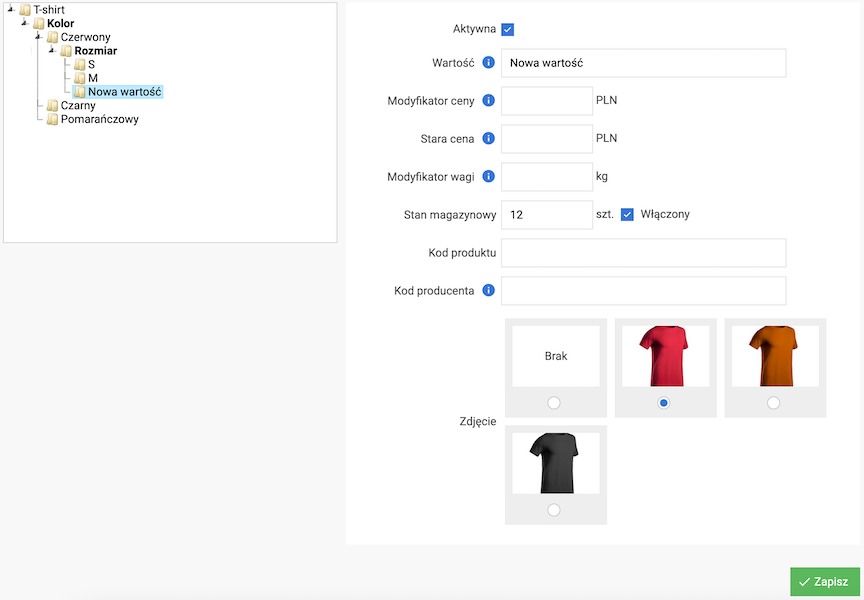
Adding Sub-Option Values to the Template
- Right-click on the Name of the option,
- Select Add,
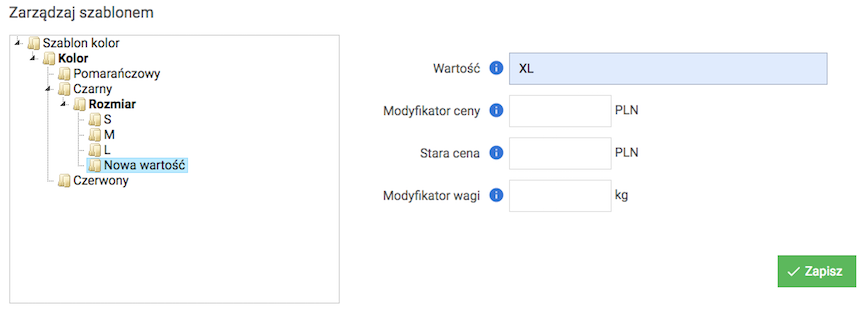
- Enter Value,
Enter the option value (e.g. green, XL).
- Enter Net Price Modifier,
- Enter Weight Modifier,
- Enter Color (HEX code e.g.
#ffa500[orange]) or upload Image,Option available for the Color filter.
- Press the Save button.
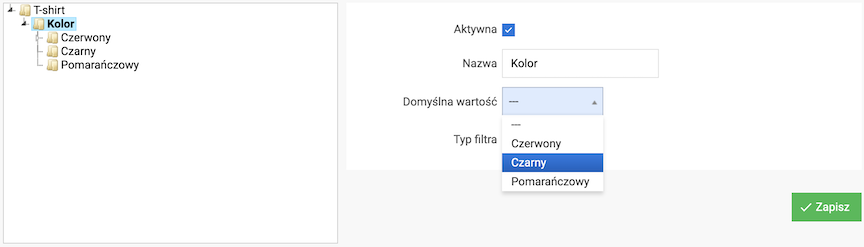
Setting default value in template
- Select the Name of the option,
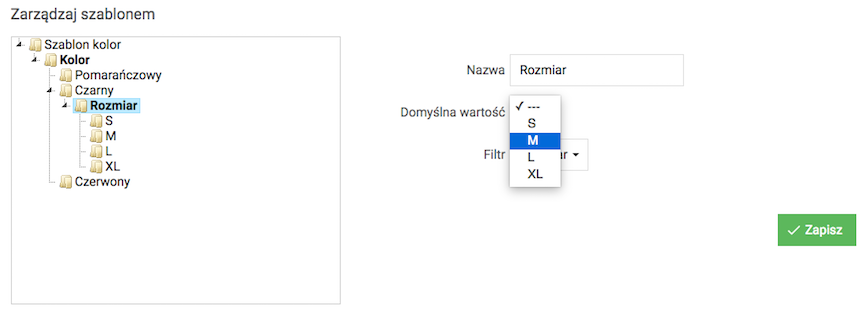
- Choose the Default value,
Option values must be entered beforehand.
- Press the Save button.
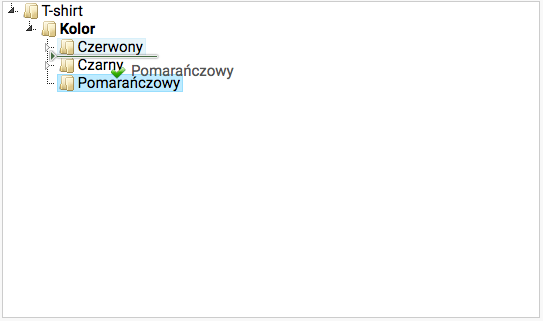
Changing the order of option values in template
- Press and hold the mouse button on the option value,
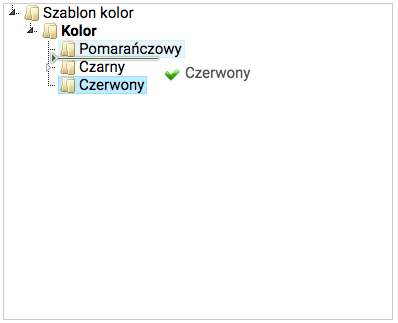
- Change the position of the option value,
- Release the mouse button.
Change nesting of options in template
- Press and hold the mouse button on the option,

- Change the position of the option,
- Release the mouse button.
Inserting option template into product
- Edit the product,
- Select Product Options,
- Right-click on the Name of the product,
- Select Add Template
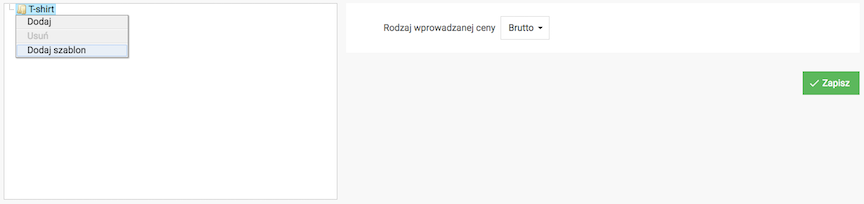
- Select Template, or click Add new template
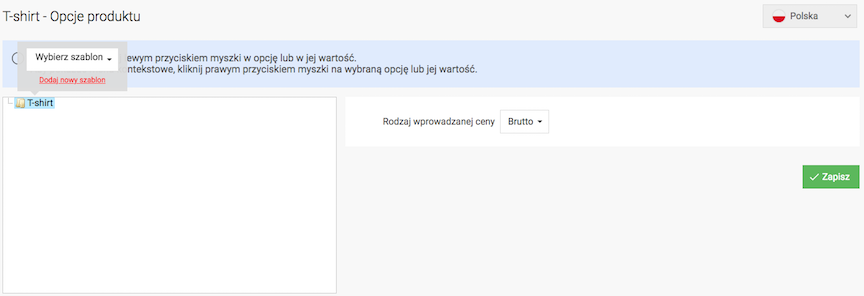
- Edit the options and their values.
Product Options
- Edit the product,
- Select Product Options.
Adding Options to a Product
- Right-click on the Name of the product,
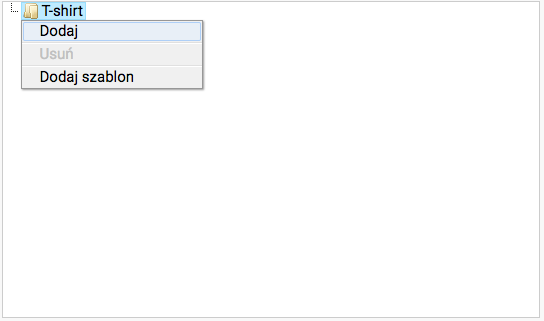
- Select Add,
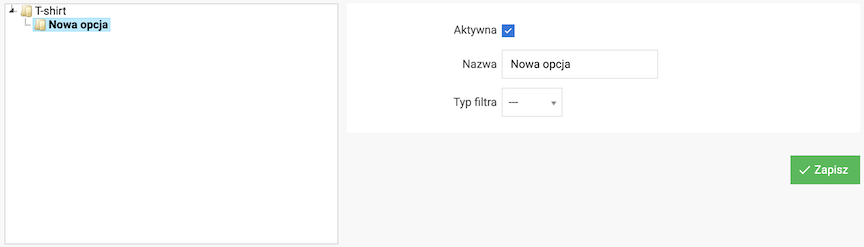
- Enter Option Name,
Enter the option name (e.g. Color, Size).
- Press the Save button.
Adding a Filter to a Product Option
- Select Option,
- Select Filter Type,
Option filters must be entered in advance.
- Press the Save button.
See how to add option filters.
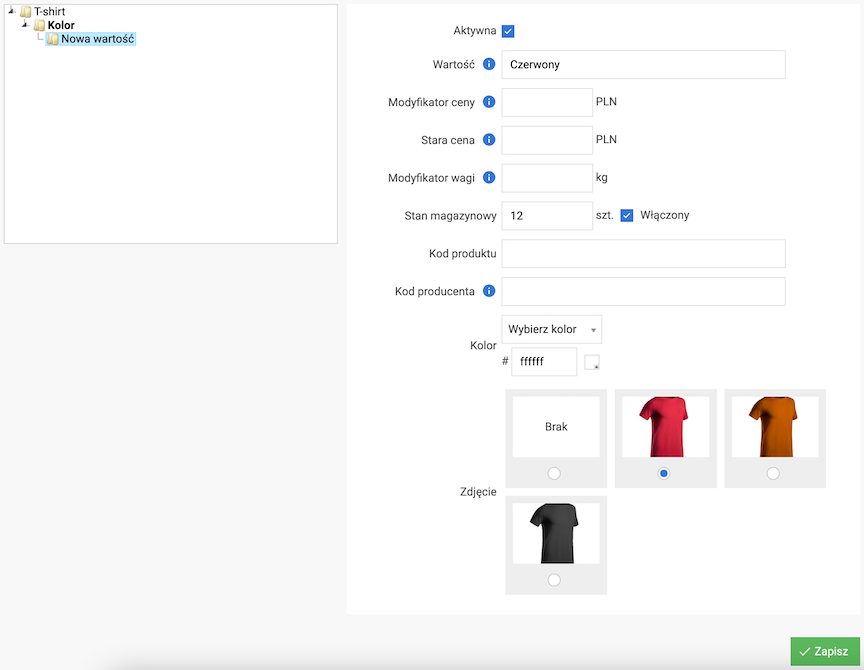
Adding Option Values to a Product
- Right-click on the Name of the option,
- Select Add,
- Enter Value,
Enter the option value (e.g. green, XL).
- Enter Net Price Modifier,
+/- amount (e.g. -10.25)- increases or decreases the net price by the given amount,+/- amount % (e.g. +50%)- increases or decreases the net price by the given percentage,amount (e.g. 30.99)- sets the given amount regardless of the product price,
- Enter Weight Modifier,
+/- weight (e.g. -10.25)- increases or decreases the weight by the given value,+/- weight % (e.g. +50%)- increases or decreases the weight by the given percentage,weight (e.g. 30.99)- sets the given weight regardless of the product weight,
- Enter Color (HEX code e.g.
#ffa500[orange]) or upload Image,Option available for the Color filter.
- Press the Save button.
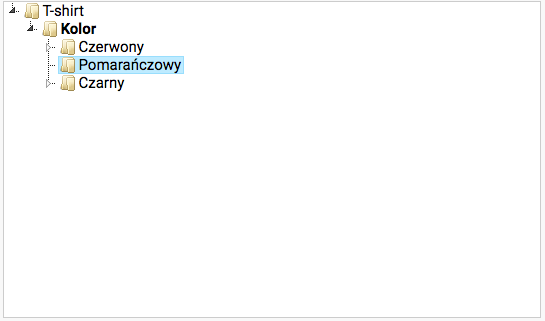
Adding Suboptions to a Product
- Right-click on Value,
- Select Add,
- Enter Option Name,
Enter the option name (e.g. Color, Size).
- Select Filter Type,
- Press the Save button.
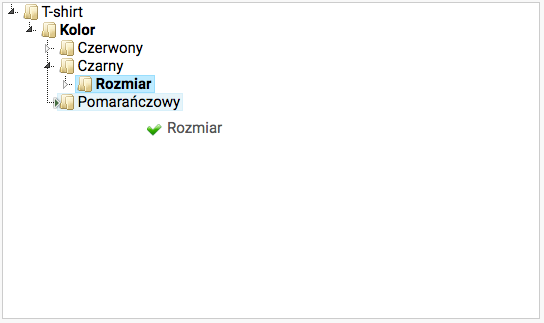
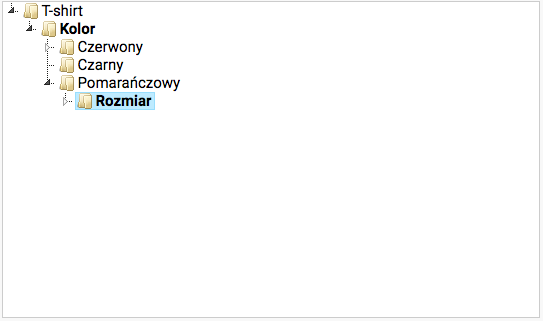
Adding Suboption Values to a Product
- Right-click on the Name of the option,
- Select Add,
- Enter Value,
Enter the option value (e.g. green, XL).
- Enter Net Price Modifier,
- Enter Weight Modifier,
- Enter Color (HEX code e.g.
#ffa500[orange]) or upload Image,Option available for the Color filter.
- Press the Save button.
Setting the Default Option Value
- Select the Name option,
- Select the Default Value,
Option values must be previously entered.
- Press the Save button.
Changing the Order of Option Values
- Press and hold the mouse button on the option value,
- Change the position of the option value,
- Release the mouse button.
Changing the Nesting of Options
- Press and hold the mouse button on the option,
- Change the position of the option,
- Release the mouse button.
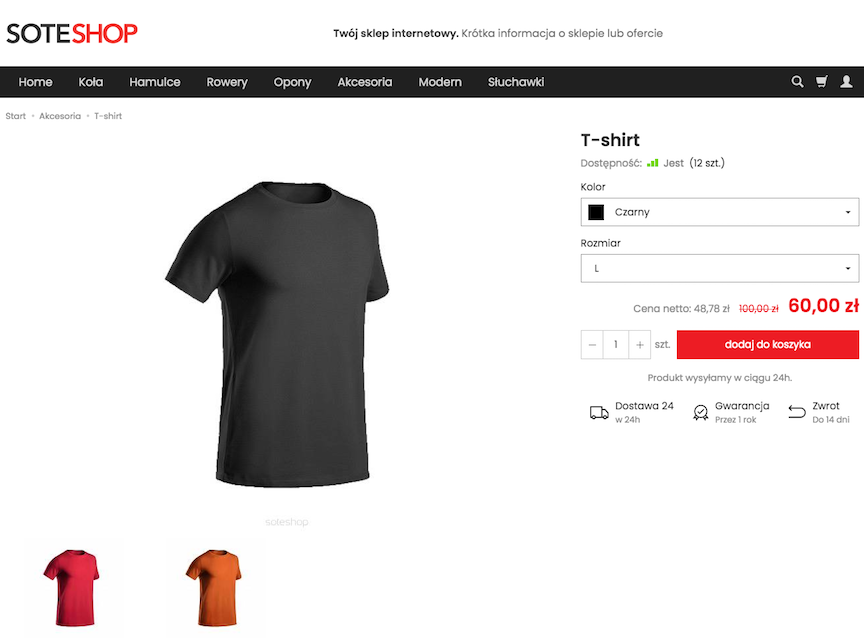
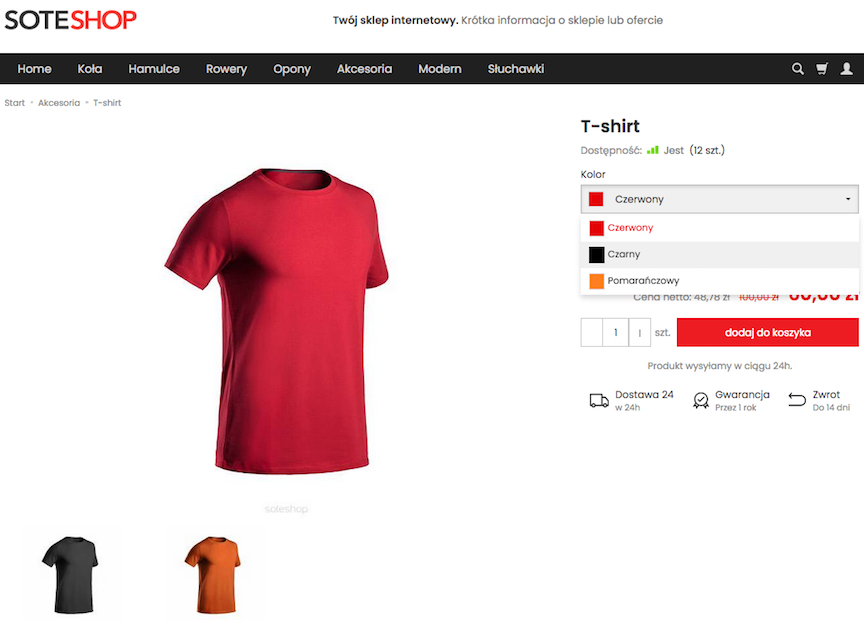
Product Look with Options
Adding Option Filters
- Select Option Filters,
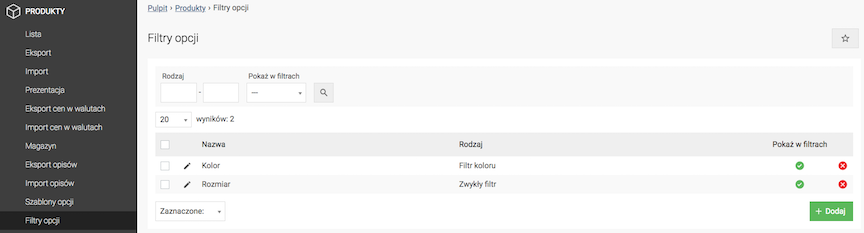
- Press the Add button,
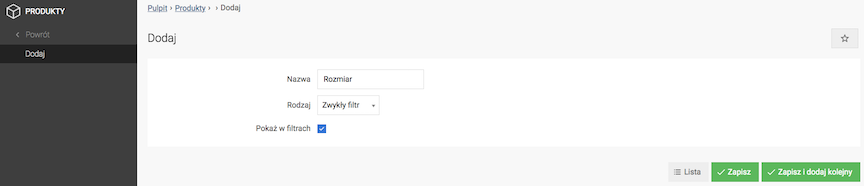
- Enter the Filter Name,
- Select the Filter Type:
- Regular Filter,
- Color Filter,
Configuring Product Options
In the admin panel, go to Applications → Products → Configuration
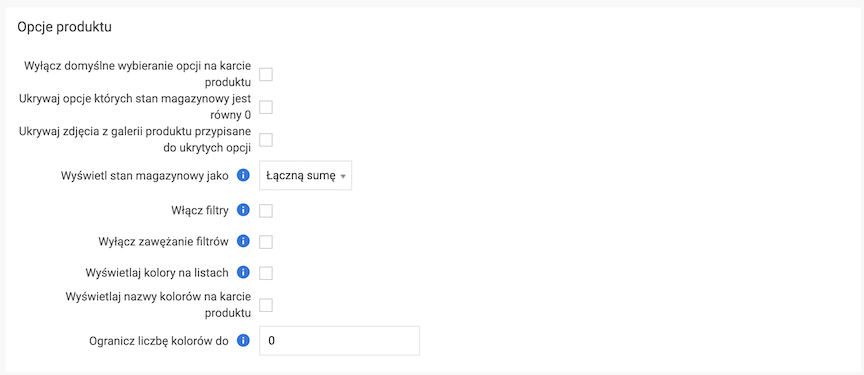
Hiding Options with Zero Stock
- Check Hide options with 0 stock,
- Press the Save button.
Option Stock Display Method on Product Lists
- Select Display stock as
- Maximum
The highest stock level of all product options is displayed.
- Total sum
The total stock level of all product options is displayed.
- Maximum
- Press the Save button.
Configuring Option Display and Filtering
- Check Disable narrowing filters,
This option will speed up the store.
- Check Display colors on lists,
Displays available product colors on the full list.
- Check Display color names on product card,
- Enter Limit the number of colors to,
The restriction applies to the full list. 0 - no restrictions.
- Press the Save button.